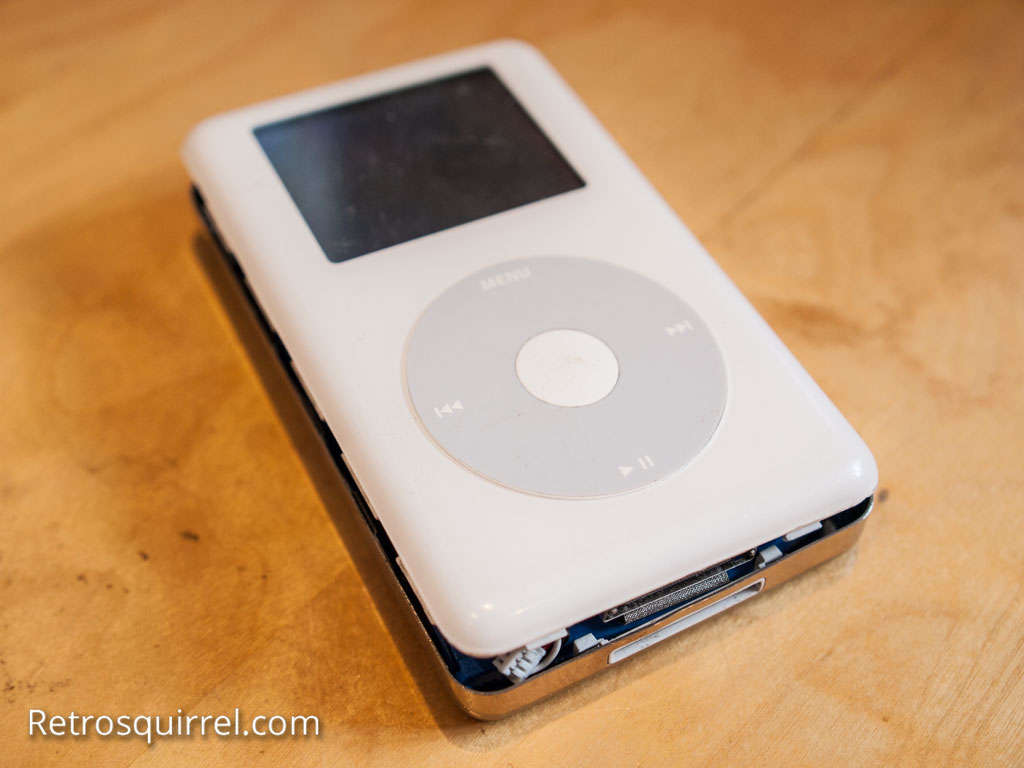
 This project is my attempt to upgrade a 4th generation 20GB Apple iPod classic to run flash memory in the form of a SD card. I’ve had a broken iPod sitting around in a drawer for ages, the hard drive failed so it just displays an Apple support warning and you can hear the hard drive springing into life and then failing in a constant loop when you power it on.
Now this repair attempt is on a budget, I’ve managed without an MP3 player for many years, so I dont want to go mad and spend loads of money on it. I did a bit of research online and found a few different ways of getting the iPod to work again. Firstly you can buy a replacement hard drive, plug it in and away you go, the downside to that is that a replacement hard drive still has moving parts,so eventually being knocked about will probably kill it again.
The second method was to covert the ipod with a 1.8″ to compact flash adaptor and simply plug in a Compact Flash card. This would be my preferred method if I wanted to spend a bit more on it, but the converter boards are around £6 and the compact flash cards start at around £45.
This leads me to the third option, 64GB SD cards are a bit cheaper than compact flash at £21, so I’ve decided to save myself a little bit of money and use a 1.8″ to compact flash adaptor, plus a compact flash to SD card adaptor. This puts my total project cost at £36.24 as opposed to £51.00.
The parts I’ve chosen are as follows:-
| Part | Retailer | Cost |
|---|---|---|
| Unbranded Compact-Flash-CF-SSD-To-Toshiba-IPod-1-8-inch-Adapter | eBay | £5.99 |
| Type 1 Extreme CF Adaptor | eBay | £8.26 |
| SanDisk Ultra 64 GB SDXC Class 10 Memory Card | Amazon | £21.99 |
I opted for a genuine SD card purchased from Sandisk as I was concerned about ending up with a fake card. I read online that the 4th gen can only read up to a maximum of 60Gb, so whilst I might have liked a bit more capacity, that’s still pretty reasonable even in 2017.
Next it was time to open up the iPod. I’d read about special case tools and this being quite tricky to do, but I found it to be fairly easy with my particular device. I applied a bit of pressure to the centre of the back of the case with my thumb, which slightly opened the crack between the metal rear and front white part of the case. I then stuck a small piece of metal into the case near the headphone jack, and with the help of the edge of an old protractor, manged to work my way around the case, carefully prying it apart.
There is a ribbon cable holding the two halves of the case together even when seperated, so open it up gently in a similar way to opening a book, you dont want to snap this cable.
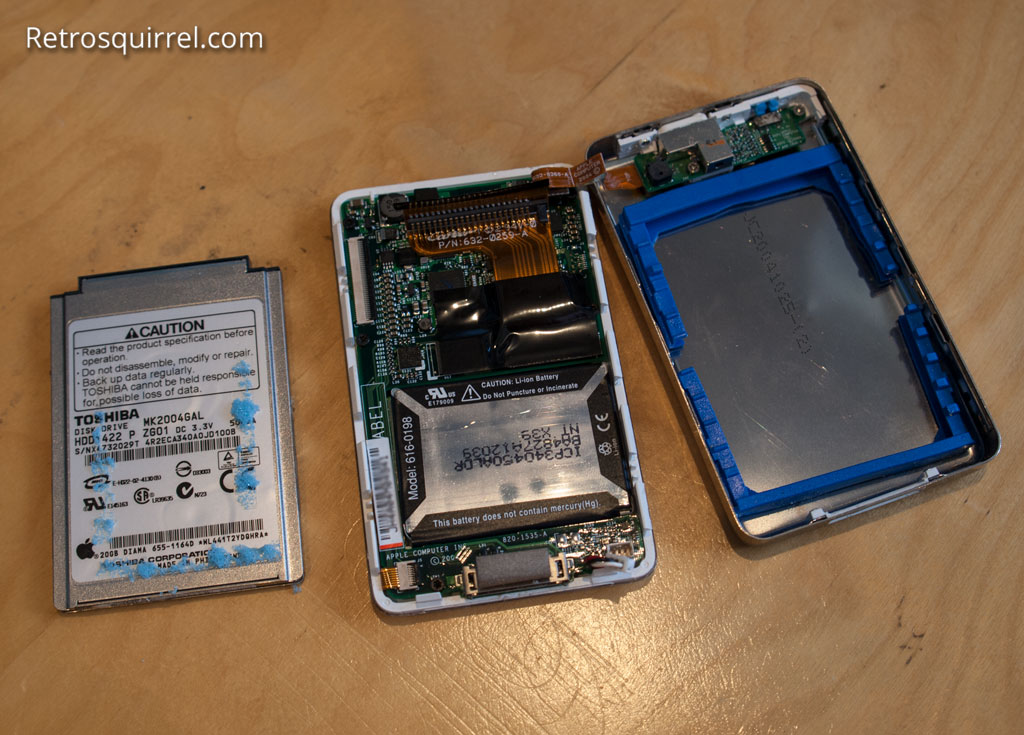
Inside you’ll find a little power connector for the battey at the bottom right, it’s got red, black and white wires leading into it. Carefully unplug this connector to remove power to your device and prevent damage.
Next up is the ribbon cable to the hard drive, it has a little flap on it which you can use to carefully disconnect it from the drive. With the cable removed, you can carefully take it out of the device and discard.
You should now end up with something similar the the image below. i had already peeled the bulk of the blue foam off the iPod and removed the blue rubber edging from the drive before taking this picture.
I’ll update this as soon as my parts arrive